How to add top bar over header in Genesis framework for WordPress
Just started using Genesis framework for WordPress? Congrats, you made a right choice! In this blog you’ll find some tips and lessons how to build great custom WordPress website using probably the best WordPress framework around.
First lesson – how to add a top bar over the header to the Genesis sample theme. It will take less than 15 minutes including styling!
How to add top bar in Genesis
If you’re going to add a top bar to your WordPress website using Genesis, you’ll probaly want to add some kind of menu or custom text to it. Here’s what we gonna do:
create a full width bar above the header
split it in half (left and right)
add widget areas both to the left ant to the right
add css styling so they would align properly
add css code to hide all the top bar (or only half of it) on mobile devices
For this example we’ll add phone number with icon on the right, and working hours with another icon on the left. We’ll use WordPress native dashicons, so there will be no need for any additional libraries.
First step – create couple of widget areas
The easiest way to do that is to add some custom code to theme’s functions.php file. Go to Appearance >> Theme Editor in WordPress website’s admin panel. Click on functions.php file on the right. Now you’ll be able to edit the file.
Scroll to the bottom of the file and add this code:
genesis_register_sidebar(
array (
'id' => 'top_bar_left',
'name' => __( 'Top bar left', 'theme-prefix' ),
'description' => __( 'Left bar above the header.', 'theme-prefix' ),
)
);
genesis_register_sidebar(
array(
'id' => 'top_bar_right',
'name' => __( 'Top bar right', 'theme-prefix' ),
'description' => __( 'Right bar above the header.', 'theme-prefix' ),
)
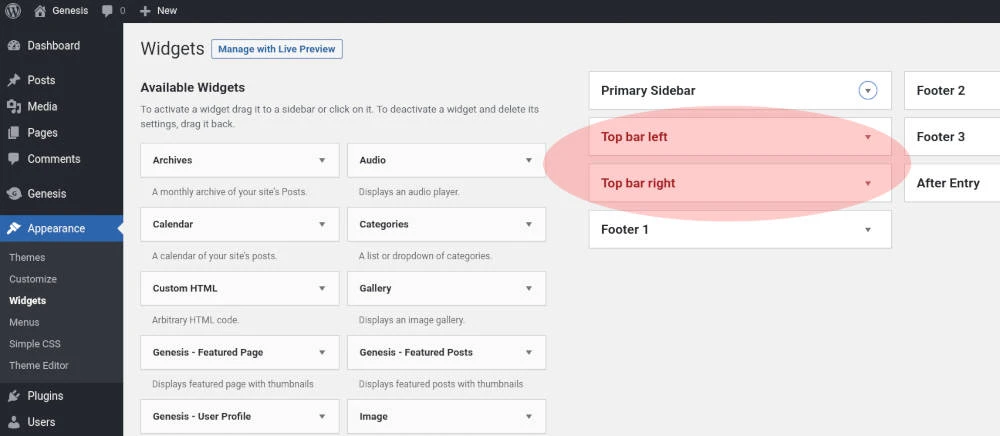
);These two functions will create two new widget areas named Top bar left and Top bar right in Appearance >> Widgets area. There you could add any widget (text, html areas, custom menus or any other WordPress widgets).
Next step – put widget areas you just created above header
That’s easy – just create another function top_bar, and call it before website header like this:
add_action( 'genesis_before_header', 'top_bar' );
function top_bar() { ?>
	<div id="top_bar">
		<div class="wrap">
			<?php
				genesis_widget_area( 'top_bar_left', array(
					'before' => '<div id="top_bar_left">',
					'after' => '</div>'
				) );
				genesis_widget_area( 'top_bar_right', array(
					'before' => '<div id="top_bar_right">',
					'after' => '</div>'
				) );
			?>
		</div>
	</div>
<?php }
Just couple of these simple steps added top bar to your WordPress theme. But if you’ll save the changes and will refresh the website, you won’t see any changes. And that’s OK, because we did not add any content to the new widget areas.
Third step – add widgets to the top bar
Go to Appearance >> Widgets, and look at widget areas. If you completed both first steps you’ll see couple of new widget areas:
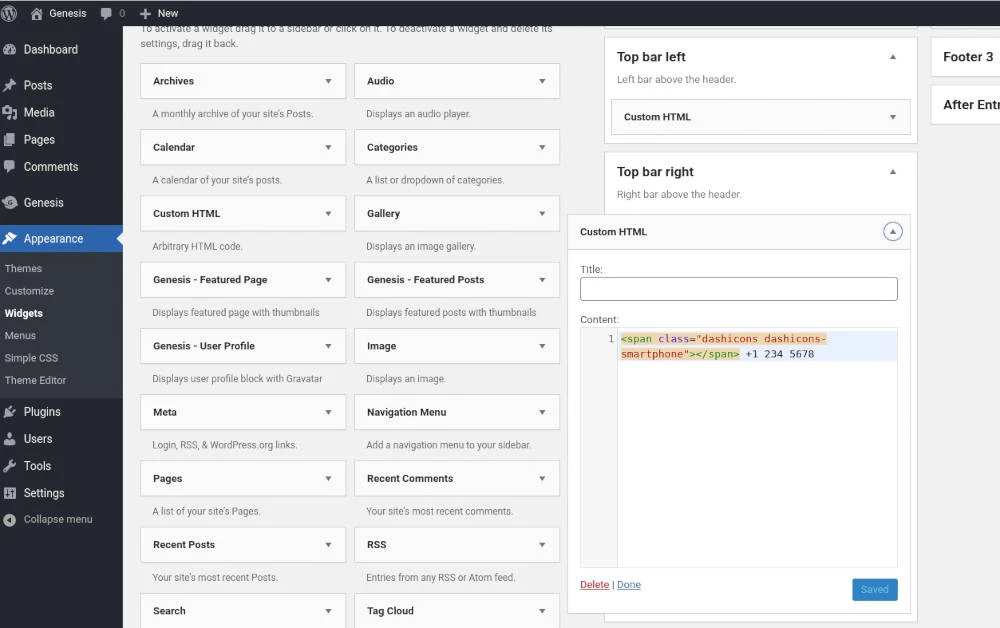
Add any widget into them. For this example I’ll add couple of Custom HTML widgets with icons and code:
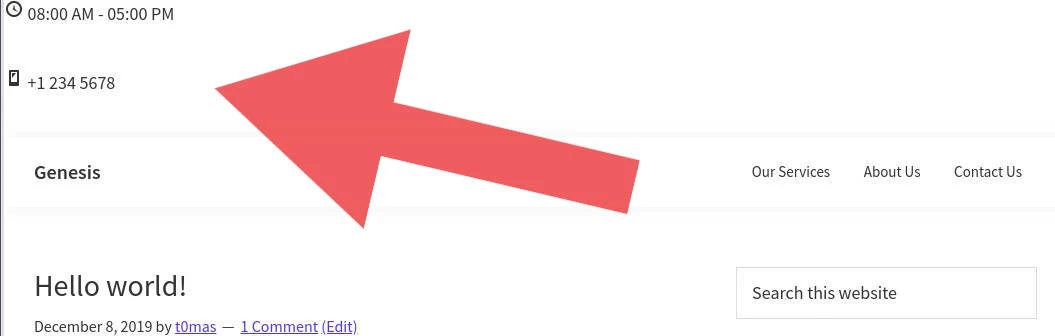
Now after refreshing website you’ll see content of both widgets above the header. It will need some styling though.
Next step – add styling to the top bar
Here’s what were going to do:
change background to dark, font color to white, and add some padding to the top bar
remove default widget bottom margin
split top bar in half, and align blocks accordingly
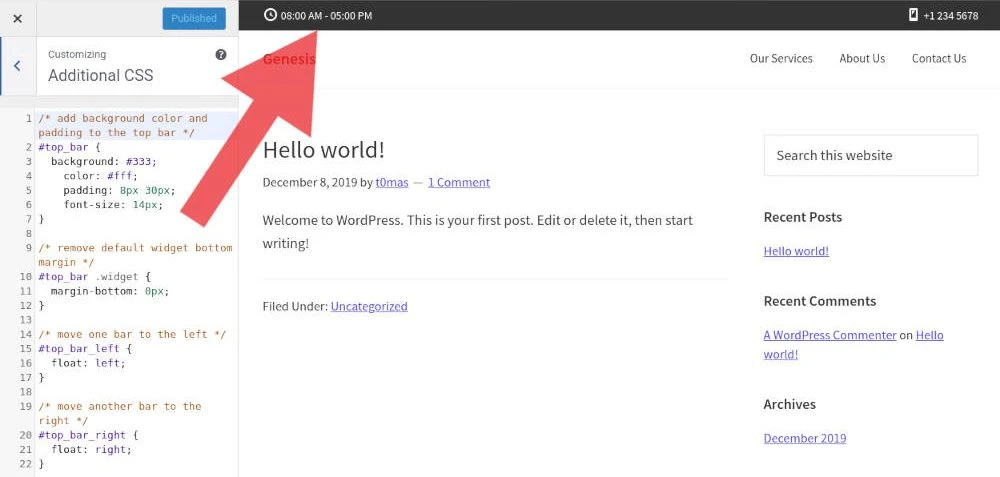
To make these changes we’ll need to write some CSS code:
/* add background color and padding to the top bar */
#top_bar {
background: #333;
color: #fff;
padding: 8px 30px;
font-size: 14px;
}
/* remove default widget bottom margin */
#top_bar .widget {
margin-bottom: 0px;
}
/* move one bar to the left */
#top_bar_left {
float: left;
}
/* move another bar to the right */
#top_bar_right {
float: right;
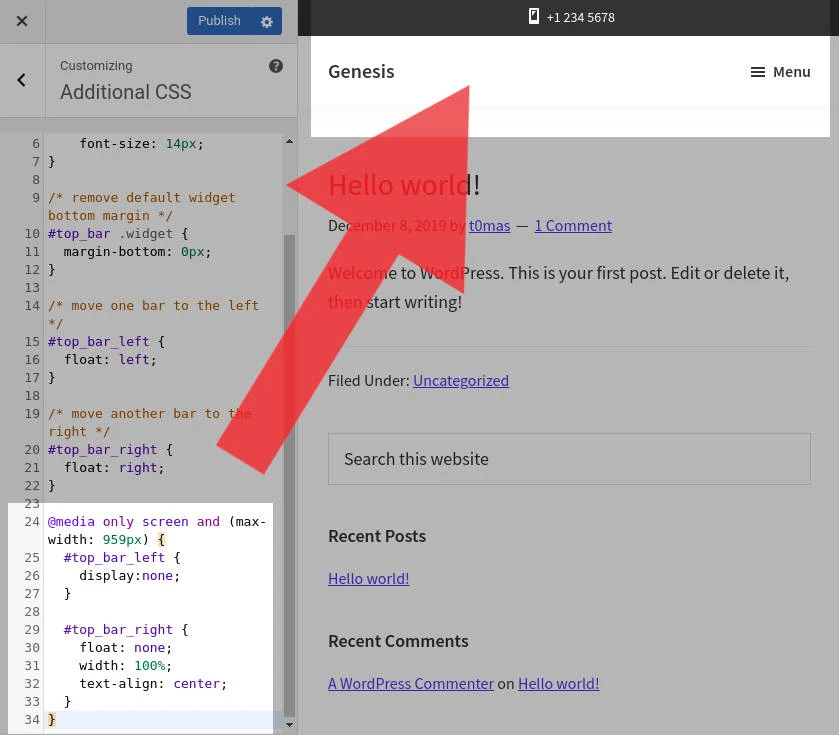
}You can add this code to the end of theme’s style.css file using Appearance >> Theme Editor , or you can open Customizer (Appearance >> Customize), and add the code to the Additional CSS tab. Using second option you’ll see all the changes live while you’re entering the code.
Final (optional) step – hide one (or all) of the top bar widgets on mobile
If you’re using lots of text in the top bar you may want to hide it on smaller resolution devices like smartphones ot tables, so you website’s header could look clean and compact on small screens.
To hide top bar completely on mobile devices you can use this code:
@media only screen and (max-width: 959px) {
  #top_bar {
    display:none;
  }
}
Basically what it tells for the browser is: don’t show top bar if browser window width is 959px or less.
If you, for example, want to hide only left side of the top bar on mobile, you can add this css code:
@media only screen and (max-width: 959px) {
  /* hide left bar content in devices with 959px width or less */
  #top_bar_left {
    display:none;
  }

  /* center right bar content on the screen */
  #top_bar_right {
    float: none;
    width: 100%;
    text-align: center;
  }
}
You may notice that instead of leaving right bar widgets on the right we moved them to the center of the page. That’s completely optional, but on my example it just looks better that way.
That’s it – you have a fully functional top bar above the header in the Genesis Sample theme.